Documentation/Nightly/Modules/GyroGuide
|
For the latest Slicer documentation, visit the read-the-docs. |
Introduction and Acknowledgements
|
Extension: GyroGuide |

Module Description
- The module should be used in cooperation with “Markups” module. First, it is required to choose five fiducial points to define two mutually-perpendicular planes as the Registration Markers. Second, set a target point and an entry point. Third, click the “Calculate” button to obtain the puncture path information, including the puncture depth and the angles between the puncture path and the reference planes. Finally, these results are displayed on a monitor or transmitted to the gyroscope-based device to assist the surgical operation.
Use Cases
- Puncture surgery (e.g. endoscopic insertion) is a typical example to show the use of this module. This module calculates the distance of the puncture path and the angle between the probe and the reference planes. The module can also transmit the calculation results to the gyroscope-based device to facilitate the surgical operation.
Tutorials
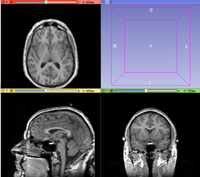
- 1 Load MRI/CT images of brain
- 2 Define “Markers”, “Target Point” and “Entry Point” using the Markups module.
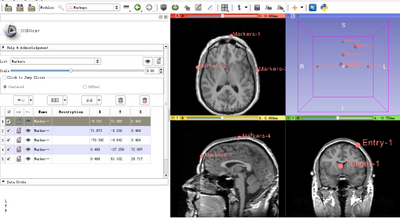
- 3 Load the defined fiducial lists


- Select GyroGuide module
- 1 Select the fiducial list - Markers as the markers which define the reference planes.
- 2 Select the fiducial list – Target as the target point
- 3 Select the fiducial list – Entry as the entry point
- 4 Calculate puncture path information
- Click the “Calculate” button. The puncture path information will be displayed in the “Results” section.
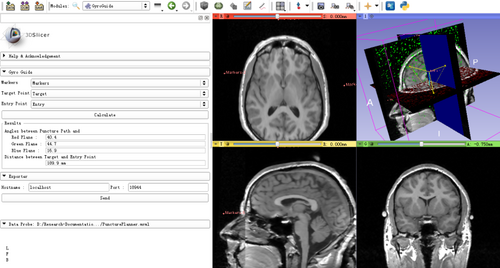

- 5 Export the results
- Input IP address and port of the puncture instrument in the “Exporter” panel. Click “Send”. The calculated puncture path information could be transmitted to the gyroscope-based device to facilitate the surgical operation.
Panels and their use

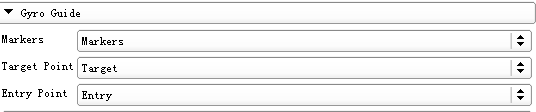
Markers Target Point Entry Point Calculate Button Similar Modules
References
Information for Developers
|