Difference between revisions of "Modules:MainApplicationGUI-Documentation"
| Line 112: | Line 112: | ||
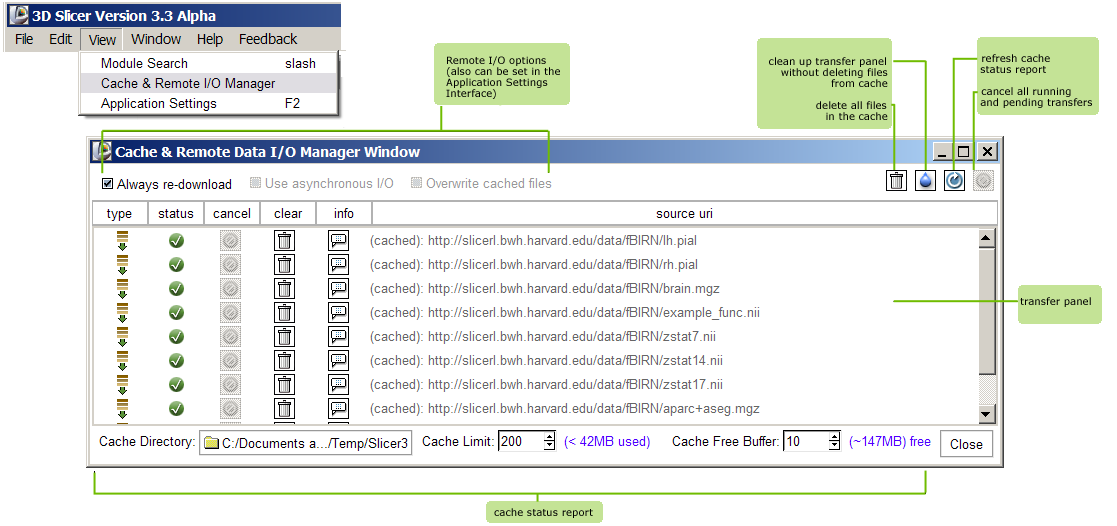
'''View->Cache & RemoteIO Manager''' | '''View->Cache & RemoteIO Manager''' | ||
| + | |||
| + | [[image:RemoteIOGUIMap.png]] | ||
'''View->Application Settings Interface''' | '''View->Application Settings Interface''' | ||
| + | |||
| + | [[image:AppSettingsGUI.png]] | ||
===Window menu === | ===Window menu === | ||
Revision as of 20:44, 4 August 2008
Home < Modules:MainApplicationGUI-DocumentationReturn to Slicer Documentation
Contents
Main Application GUI organization
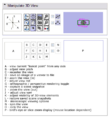
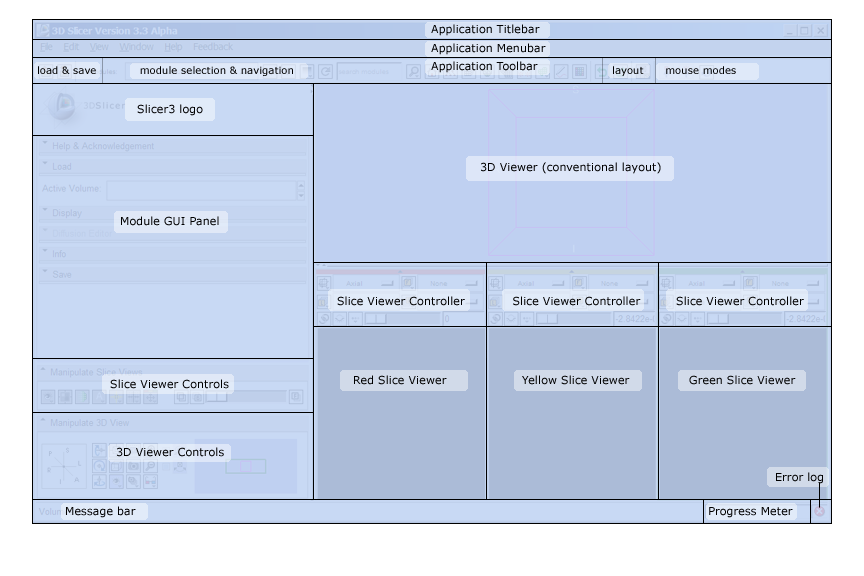
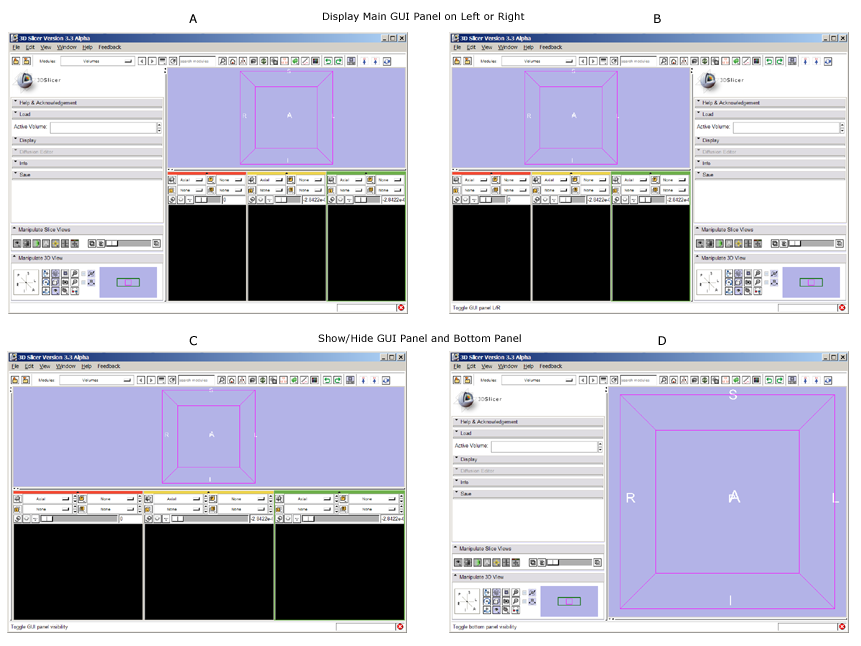
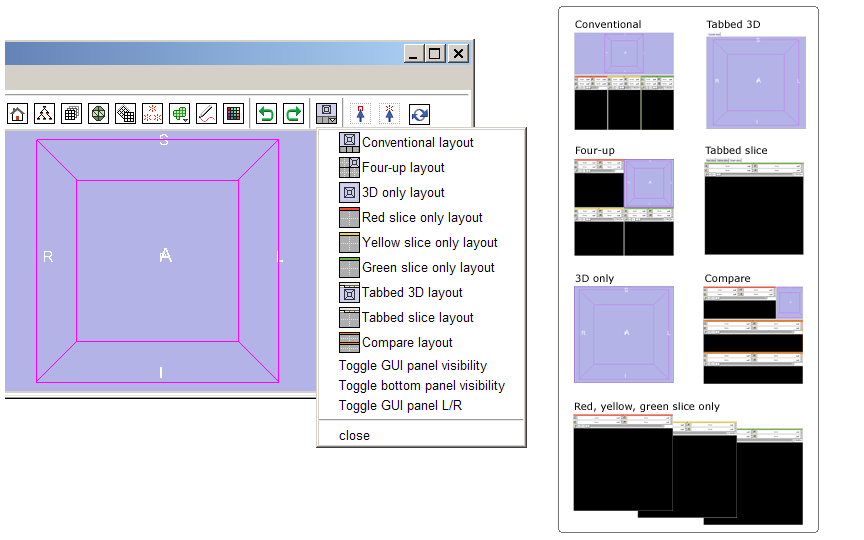
Slicer3's main desktop interface provides top-level access to most commonly-used features, and organizes them into logical groupings. These groups of features are presented in a number of interface panels on the GUI, as is illustrated in the basic layout below. The interface is designed to be easy to learn and remember, to ease navigation of Slicer's large (and growing) functionality, and to easily collapse and hide when you don't need to see it. Figures A through H in the gallery at the top of this page provide richer detail and will be described in sections below.
As shown above, the logical groupings of Slicer's interface elements include:
- The Application Menubar
- The Application Toolbar
- The Main GUI Panel, which consists of:
- Slicer's Logo Panel
- The Module GUI Panel
- The Slice Viewer Controls
- The 3D Viewer Controls
- The 3D Viewer
- Three Main Slice Viewers (Red, Yellow, and Green)and additional Slice Viewers
- The Message Bar and Progress Gauge
- And the Error Log Button
An overview of the functionality provided in each of these interface elements is provided below.
Application Menubar
The Application menubar is at the very top of Slicer3's main window, as noted above and in Figure A. Its menus and functionality are briefly listed below.
File->Load Scene: This command raises a file browser so that you can navigate to a MRML scene and select it for loading into Slicer. The command first clears any existing scene in Slicer and resets the application state.
File->Import Scene: This command raises a file browser to that you can navigate to a RML scene and select it to be added to the existing Slicer scene.
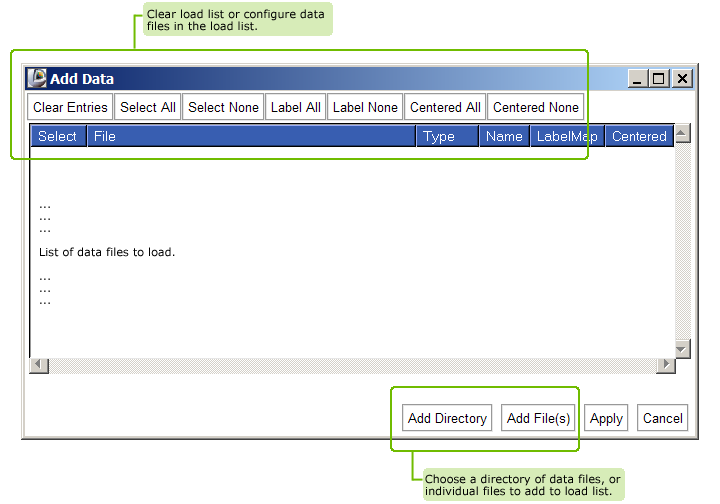
File->Add Data: This command raises an "Add Data" widget (shown below) that allows you to select individual datasets to add to the existing scene:
- The "Add Directory" button adds all files within the selected directory to the file list.
- The "Add File(s)" button adds all selected files to the file list.
- The array of buttons across the top allow you to select and deselect files in the file list, remove selected files from the list, or describe how files should be loaded.
- The "Apply" button loads all datasets in the list, and
- The "Cancel" button aborts the entire load.
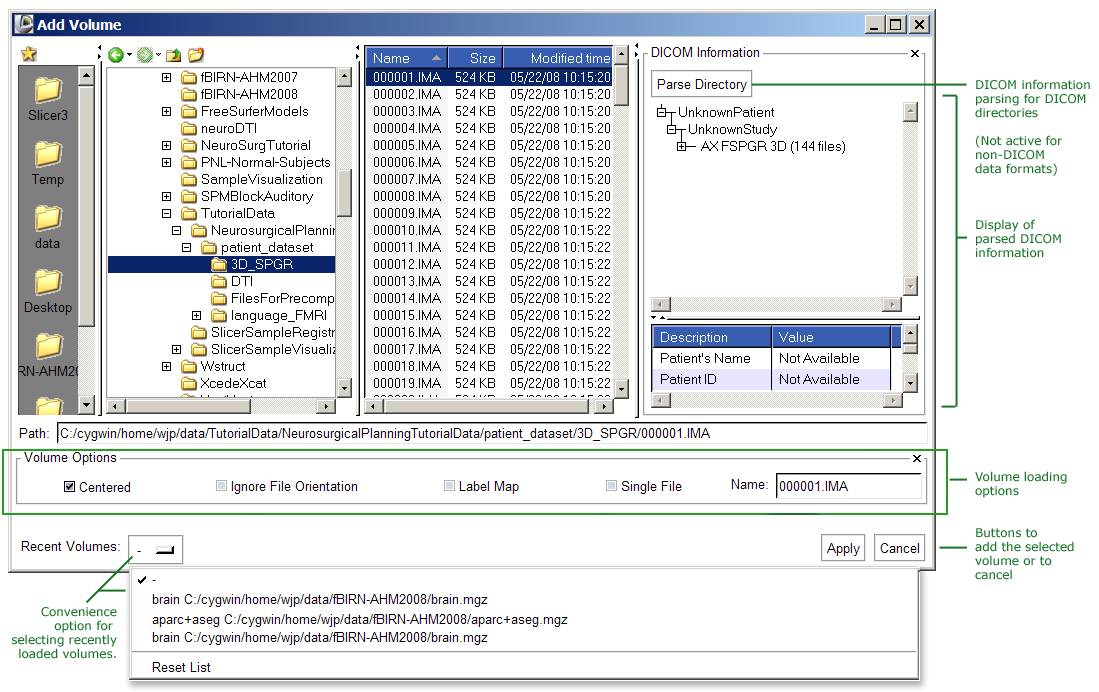
File->Add Volume: This command raises an "Add Volume" widget (shown below) that allows you to select a volumetric dataset to add to the existing scene. The "Volume Options" panel can be used to clarify how a selected dataset should be loaded and displayed.
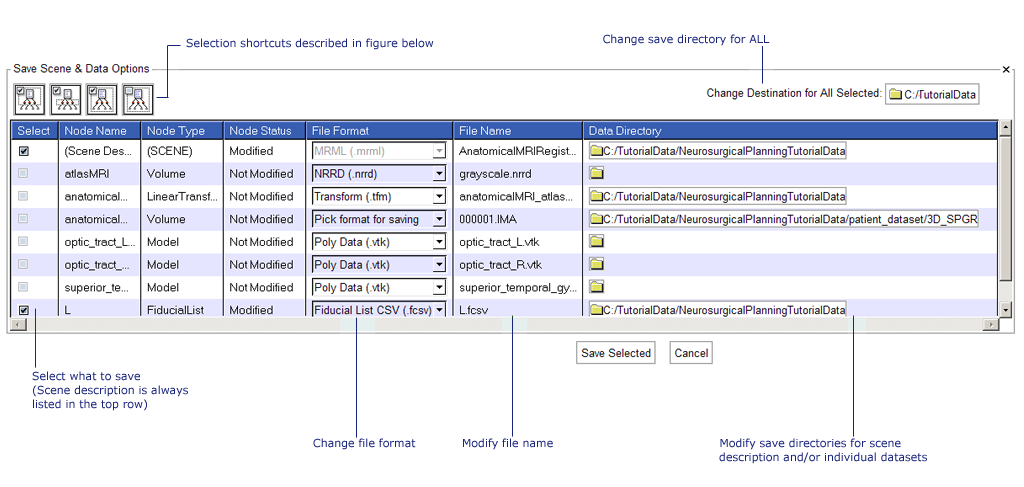
File->Save: This command displays the "Save Data" widget, which offers many options for saving a scene and/or individual datasets. The widget includes a "Save Scene" panel and a "Save Data" panel beneath it.
Specifying a scene file to save: The Scene File button raises a file browser from which a file can be selected or a new scene file can be specified. If a scene has already been loaded from a MRML file, then its filename is presented as the default choice. To save the scene into a new MRML file, first select the directory/folder and then provide a file name. The Save Scene checkbox just below must be selected in order to save the scene file; otherwise, only selected datasets will be saved.
Indicating new and unsaved datasets: When the panel is first displayed, all datasets which have been newly created or modified since the scene was saved are checked by default in the "Save Data" panel's Save column. Any datasets in the scene can be checked/unchecked for saving/not saving using the checkboxes provided in this column. The Save All and Save None buttons check or uncheck all listed datasets, respectively. Any dataset's filepath and filename may be edited to save the dataset in a location different from that specified. To save an individual model/volume, first select it for storing and THEN select the directory/folder.
Converting to other data formats: Any dataset can be converted to a different (supported) format by editing the filename extension. Click at the end of the filepath/name string and edit. (nrrd is for nrrd files).
Supported formats include:
List current supported data formats here.
Saving data: Selecting the Save button will launch the scene/data saving process, and Cancel will abort it.
File->Close Scene: This command closes the current scene and resets the application state.
File->Exit This command exits Slicer.
Edit->Set Home This command sets a user's 'home module', which is the module displayed by default each time the Slicer application is started. The home module is saved in the Application Registry.
Edit->Undo This command undoes the history of undoable commands, from last to first.
Edit->Redo This command re-does the history of commands most recently undone, from last to first.
Edit->Edit Box This command raises the Edit-box, a lightweight image editing tool.
Edit->New Fiducial List This command creates a new list of fiducial points.
View->Module Search
View->Cache & RemoteIO Manager
View->Application Settings Interface
Window->Hide Main Panel (F5)
Window->Hide Bottom Panel (F6)
Window->Toolbars
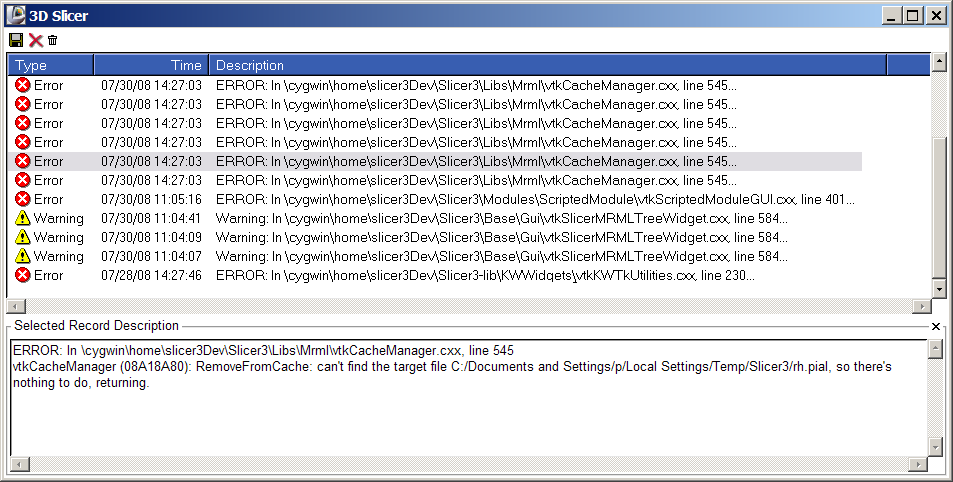
Window->Log Window (Ctrl+Alt+E)
Window->Tcl Interactor (Ctrl+T)
Help->Browse Tutorials
Help->About Slicer3
Feedback->Report a Bug
Feedback->Report a Usability Issue
Feedback->Make a Feature Request
Feedback->Community
Application Toolbar
Module GUI Panel
Slice Viewer Control Panel
3D Viewer Control Panel
- Scene Snapshots
- Scene snapshots are a good way to record a particular composition of a view. Among the things recorded are: Models turned on or off. Thresholds, window level, are the cross sections on or off, etc.
- Click on the camera icon to record a scenesnapshot.
- Use the pull down menu to select from a list of existing ones.
- Click on the arrow to restore the view.
Main 3D Viewer
Slice Viewers & Controllers
- Slice viewers can be used to specify oblique reformats using the 'Reformat' orientation (instead of axial, coronal, sagittal) and CTRL-Right-Button-Move (subject to change).
- On each viewer, there is a menu button in the upper left of the control pane that usually says "axial", "coronal", or "sagittal". There is a forth option that one can select from the button which is "reformat".


