Documentation:Nightly:Registration:RegistrationLibrary:RegLib C06
Contents
Slicer Registration Library Case #6: Breast MRI Cancer Treatment
Input
| this is the main fixed reference image. All images are ev. aligned into this space | this is the main fixed reference image. All images are ev. aligned into this space | lleft | 
|
| exam 1: baseline Pre Rx | exam 1: follow-up Post Rx |
Description
This is an example of serial/logitudinal imaging for change assessment. We have a pre- and post-treatment MRI. To assess the treatment effect we seek to register the postRx scan to the baseline. Because of the strong changes in image content and contrast between the two exams, some additional work is necessary to obtain a good registration: 1) we will register only the left breast containing the tumor, i.e. we will crop the image to a much smaller FOV, while also obtaining a more isotropic resolution; 2) we have strong intensity bias in the images (originating from MR receiver coil sensitivity) that needs to be corrected first, otherwise it will negatively bias the registration; and 3) we will generate masks that include the breast but not the tumor, to ensure the nonrigid portion of the registration will not try to compensate for the tumor change.
Modules used
- Crop Volume
- N4ITKBiasFieldCorrection (filter correcting for local intensity inhomogeneity)
- 'Foregroud masking (BRAINS) (quick mask generation)
- Editor
- General Registration (BRAINS)
Download (from NAMIC MIDAS)
Why 2 sets of files? The "input data" mrb includes only the unregistered data to try the method yourself from start to finish. The full dataset includes intermediate files and results (transforms, resampled images etc.). If you use the full dataset we recommend to choose different names for the images/results you create yourself to distinguish the old data from the new one you generated yourself.
- RegLib_C06.mrb: input data only, use this to run the tutorial from the start (Slicer mrb file. 19 MB).
- RegLib_C06_full.mrb: includes raw data + all solutions and intermediate files, use to browse/verify (Slicer mrb file. 19 MB).
Keywords
MRI, breast, intra-subject, breast cancer, treatment effect
Video Screencasts
- Movie/screencast showing importing and cropping the image volume
- Movie/screencast showing the bias (intensity inhomogeneity) correction step
- Movie/screencast showing building the masks for registration
- Movie/screencast showing affine + BSpline registration
Procedure
- Crop:Extract left breast image of PreRx and PostRx scan
- Open the Crop Volume module
- Input volume: "PreRx"
- Input ROI: "Create new annotation ROI"
- ROI visibilité: turn on
- Isotropic output voxel: yes (checkbox)
- Interpolator: "WindowedSinc" (radio button)
- place/drag the color markers visible in the slice views to enclose the left breast only (right side of image)
- click on Crop! button
- go to the Data module
- several new nodes were created: look for the "PreRx_subvolume-scale_1" entry, double click and rename to "PreRx_Left"
- repeat the same for the "PostRx" image
- Save intermediate results.
- Phase 2: MRI Bias field inhomogeneity correction
- Open the N4ITKBiasFieldCorrection module
- Input Image: PreRx_left
- Mask Image: none
- Output Volume: create & rename new: "PreRx_left_n4"
- leave all parameters at defaults
- Apply.
- repeat for the Post_Rx image.
- save intermediate results
- Phase 3: Build masks
- open the Foregroud masking (BRAINS) module (under Segmentation:Specialized)
- Input Image Volume: PreRx_left
- Output Mask: create & rename new: "PreRx_mask"
- Output Image clipped by ROI: none
- Configuration Parameters:
- ROI Auto Dilate Size: 0.1
- defaults for the rest
- Apply
- repeat for Post_Rx_left_n4
- save intermediate results
- we need to exclude the tumor from the mask, to prevent the registration from trying to match that region. Much should already be excluded from the above segmentation, but it may be necessary to apply some manual edits:
- Go to the Editor module
- Click Apply on the popup do confirm colormap selection (choice does not matter)
- Master Volume: PreRx_left
- Merge Volume: PreRx_mask (generated above)
- click on the Brush Icon ("PaintEffect")
- Label: 0 (black)
- increase radius to ~ 10-15 mm.
- navigate to an axial slice showing the tumor
- click & drag left mouse to apply, then use arrow keys to move to the next slice.
- repeat for Post_Rx_mask
- save intermediate results
- Phase 4: Affine pre-Registration
- open the General Registration (BRAINS) module
- Fixed Image Volume: PreRx_left_n4
- Moving Image Volume: PostRx_left_n4
- Output Settings:
- Slicer BSpline Transform": none
- Slicer Linear Transform: create & rename new transform, rename to "Xf1_Affine"
- Output Image Volume: none
- Registration Phases: check boxes for Rigid , Rigid+Scale and Affine
- Main Parameters:
- Number Of Samples: 200,000
- Leave all other settings at default
- Apply
- this should generate a first alignment. note that the Slicer4.1 version of BRAINS registration does not automatically place the moving volume inside the result transform, as it did for Slicer 3.6. In order to see the result, you must either go to the Data module and drag the moving volume inside the transform node, or select to generate a resampled Output Volume. See demo movie you can download above on how to do this.
- Phase 5: Nonrigid final registration
- open the General Registration (BRAINS) module
- Fixed Image Volume: PreRx_left_n4
- Moving Image Volume: PostRx_left_n4
- Output Settings:
- Slicer BSpline Transform": create & rename new transform, rename to "Xf2_BSpline"
- Slicer Linear Transform: none
- Output Image Volume: create & rename new transform, rename to "PostRx_left_Xf2"
- Registration Phases: uncheck rigid & affine boxes, check box for BSpline only
- Main Parameters:
- Number Of Samples: 300,000
- B-Spline Grid Size: 7,7,5
- Mask Option: select ROI button
- ROI Masking input fixed: select "PreRx_mask" generated in Phase 3 above
- ROI Masking input moving: select "PostRx_mask" generated in Phase 3 above
- Leave all other settings at default
- click: Apply
- Intra-Exam: register intra-examT1Gd to PD
- open the General Registration (BRAINS) module
- Fixed Image Volume: e1_PD
- Moving Image Volume: e1_T1Gd
- Output Settings:
- Slicer BSpline Transform": none
- Slicer Linear Transform: create & rename new transform: Xf1_e1-T1Gd_Affine.tfm
- Output Image Volume: none
- Registration Phases: check boxes for Rigid, Rigid+Scale and Affine
- Main Parameters
- Number of Samples: 200,000
- click: Apply; runtime < 10 sec (MacPro QuadCore 2.4GHz)
- repeat for exam 2, i.e
- Fixed Image Volume: e2_PD
- Moving Image Volume: e2_T1Gd
- Slicer Linear Transform: create & rename new transform: Xf2_e2-T1Gd_Affine.tfm
- Inter-Exam Registration: register exam 2 -> exam 1
- open the General Registration (BRAINS) module
- Fixed Image Volume: e1_PD
- Moving Image Volume: e2_PD
- Output Settings:
- Slicer BSpline Transform": none
- Slicer Linear Transform: create & rename new transform: Xf3_e21_Affine.tfm
- Output Image Volume: none
- Registration Phases: check boxes for Rigid and Affine
- Main Parameters
- Number of Samples: 200,000
- click: Apply; runtime < 10 sec (MacPro QuadCore 2.4GHz)
- Organize transform hierarchies
- go to the Data module
- drag the volume node e1_T1Gd onto the transform Xf1_e1-T1Gd_Affine; let go of the mouse button when you see a hilight box appear around the transform node name
- drag the volume node e2_T1Gd onto the transform Xf2_e2-T1Gd_Affine;
- drag the volume node e2_T2 onto the transform Xf3_e21_Affine.tfm
- drag the transform node Xf3_e2_T1Gd_Rigid.tfm onto the transform Xf1_e21_Affine.tfm
- drag the entire transform Xf2_e2-T1Gd_Affine and its contents onto the transform Xf3_e21_Affine.tfm
- your MRML data tree should look something like this:
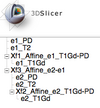

- Apply Transform (without resampling)
- for linear (rigid to affine) transforms you have two options for generating a result image in the new orientation: with and without resampling. The method without resampling leaves the original image data untouched and writes the new orientation into the image header. This preserves the full original image quality and is the preferred method, provided that the software using the result image can read the spatial information in the header correctly. If you open an image with a software that does not account for this header information, the image will appear in its original orientation. The resampling method will create a new image volume by interpolating the data into the new space. This has the advantage that your registered volume will have matching size and resolution as your reference image, but it is associated with some data loss from the interpolation during resampling.
- Apply Transform without resampling:
- Go to the Data module
- left click on the moving image node and drag it into/onto the transform node. You should see a "+" sign appear next to the transform node indicating the volume is now placed under that transform. If the image is in either foreground or background and visible in the slice views or 3D view, you will see the image update to its new position immediately.
- right click on the image node and from the pop-up menu, select Harden Transform. This will apply the transform and move the image node back outside onto the main level.
- double click on the image node and rename it to document that this is no longer the original image but the reoriented one. Note that the image in its original position is replaced in memory and no longer accessible. There is no "undo" for this step, so if you wish to return to the original image, you must reload it from the original file. Be careful not to accidentally overwrite the original image file with the resampled one. Use a new filename when saving the image.
- Alternative: Apply Transform with resampling:
- Go to the BRAINSResample module
- Image To Warp: select e2_PD
- Reference Image: select e1_PD
- Outputs:OutputImage: create & rename new, rename to "e2_PD_Xf3"
- Pixel Type: select short , or match the datatype of the original image.
- Transform File: select "Xf3_e21_Affine.tfm"
- Interpolation Mode: select "WindowedSinc" (recommended for 3D MRI). For labelmaps select Nearest Neighbor
- Click Apply. This will generate a new volume with the same resolution as the reference image.
- repeat the same for the label map, but select Nearest Neighbor as the interpolation type.
- Go to the BRAINSResample module
Registration Results
 |
baseline PD & contrast T1Gd before registration (click to enlarge) |
 |
baseline and follow-up PD before registration (click to enlarge) |
 |
baseline PD & contrast T1Gd after registration (click to enlarge) |
 |
baseline and follow-up PD after registration (click to enlarge) |
 |
baseline and follow-up T1Gd contrast after registration(click to enlarge) |