Documentation:Nightly:Registration:RegistrationLibrary:RegLib C32
|
For the latest Slicer documentation, visit the read-the-docs. |
Contents
Slicer Registration Library Case #29: Intra-subject Brain DTI
Input

|

|

|

|
this is the DTI tensor image, in the same orientation as the DTI Baseline |
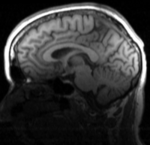
| moving image T1 SPGR |
fixed image 1 T2 |
moving image DTI baseline+DTI tensor |
Modules used
- DiffusionWeightedVolumeMasking
- Diffusion Tensor Estimation
- Editor (for mask generation)
- General Registration (BRAINS)
- Resample DTI Volume
Objective / Background
This is a classic case of a multi-sequence MRI exam we wish to spatially align to the anatomical reference scan (T1-SPGR). The scan of interest is the DTI image to be aligned for surgical planning/reference.
- The DWI sequence (EPI) contains distortions we seek to correct via non-rigid alignment
- The DWI sequence also contains intensity inhomogeneity (coil bias)
- the DTI baseline is similar in contrast to a T2, albeit at much lower resolution
- we have different amounts of voxel-anisotropy
Download (from NAMIC MIDAS)
Why 2 sets of files? The "input data" mrb includes only the unregistered data to try the method yourself from start to finish. The full dataset includes intermediate files and results (transforms, resampled images etc.). If you use the full dataset we recommend to choose different names for the images/results you create yourself to distinguish the old data from the new one you generated yourself.
- RegLib_C32_raw.mrb (input data, Slicer mrb file. 71 MB).
- RegLib_C32_full.mrb (input data+results, Slicer mrb file. 124 MB).
Keywords
MRI, brain, head, intra-subject, DTI, T1, T2, non-rigid, tumor, surgical planning
Registration Approach
- a direct registration of the DTI_baseline to the T1 is not recommended, since the T2 is a better match in contrast to the DTI baseline. We therefore first align the DTI with the T2 and then also register the T1 to the T2.
- the DTI-T2 registration includes non-rigid deformation to correct for the strong distortions from the EPI acquisition. Because of the nonrigid component a mask of the brain parenchyma helps in obtaining a meaningful transform. Registration without a mask is possible but not as good as with a mask.
- The DTI estimation provides an automated mask for the DTI_baseline scan, but we have no mask for the T2. We obtain a T2 mask through separate segmentation.
- thus the suggested pipeline is:
- convert the DWI to DTI and generate a mask + baseline image
- build a mask for the T2
- Register DTI_baseline to T2
- Resample DTI with the result transform
- Register T1 to T2
Video Screencasts
- Phase 1: Converting DWI to a DTI image
- Phase 2:Building a Mask for the T2 (See here for a selection of videos showing 6 different methods to build a mask)
- Phase 3:Register DTI baseline to T2 (with dilated mask)
- Phase 4:Resample DTI into space of T2
- Phase 5:Register T1 to T2
Procedures
- Phase 1: Preprocessing: Bias Correction of T1
- open the N4ITKBiasFieldCorrection module
- Input image: T1
- Output Volume: create & rename new, rename to "T1_biascorr" or similar
- Leave all other settings at defaults. Click: Apply. Processing may take 1-2 minutes based on your CPU.
- Phase 2: Affine Registration
We first perform an affine registration for a rough alignment. Once this succeeds we continue to the nonrigid (BSpline) portion. Because Affine registration does not require resampling, there is no cost (in terms of data loss) of separating this step.
- open the General Registration (BRAINS) module
- Fixed Image Volume: DTI_baseline
- Moving Image Volume: T1_biascorr
- Output Settings:
- Slicer BSpline Transform": none
- Slicer Linear Transform: create & rename new transform, rename to "Xf1_DTI-T1"
- Output Image Volume: create new volume, rename to T1_Xf1 (we use this only to verify the result, we can discard afterwards)
- Registration Phases: check boxes for Rigid, Rigid+Scale, Affine
- Main Parameters:
- Number Of Samples: 200,000
- Leave all other settings at default
- click: Apply.
- upon completion: place T1_Xf1 and DTI_baseline into foreground and background, respectively, and fade back and forth to verify alignment. Areas of DTI distortions need not match up exactly, but the overall parenchyma should be well aligned.
- Phase 3: BSpline Registration
We now proceed to the nonrigid (BSpline) portion, using the above Affine transform as a starting point. This creates a new transform that includes both the affine and the BSpline portion. Because nonrigid transforms cannot be visualized directly, a resampled volume is required for this step.
- open the General Registration (BRAINS) module
- Fixed Image Volume: DTI_baseline
- Moving Image Volume: T1_biascorr (not the T1_Xf1)
- Output Settings:
- Slicer BSpline Transform": create & rename new transform, rename to "Xf2_BSpline"
- Slicer Linear Transform: none
- Output Image Volume: create & rename new volume, rename to T1_Xf2
- Registration Phases: uncheck boxes for Rigid, Rigid+Scale, Affine , check box for BSpline
- Main Parameters:
- Number Of Samples: increase to 300,000 (or more)
- B-Spline Grid Size: 3,3,3
- Mask Option: select ROI button
- Leave all other settings at default
- click: Apply. This may take 1-2 minutes depending on your CPU.
- as above, verify by fading between DTI_baseline and T1_Xf2
- you can also examine the deformation portion only by placing T1_Xf1 and T1_Xf2 into fore- and background and fading between them.
- Save results.
Registration Results
 |
original and registered pair of T1 and DTI (click to enlarge) |