Difference between revisions of "Slicer3:XND"
| Line 42: | Line 42: | ||
===Fixing misspecified tags=== | ===Fixing misspecified tags=== | ||
| − | + | Any or all tags can be removed from managed files using the "Remove tag" or "Remove all" menu options as shown below (in "Folder view"). If you see any errors, remove a tag, and re-specify its value if appropriate. | |
[[image:XNDremovetags.png]] | [[image:XNDremovetags.png]] | ||
Revision as of 18:46, 6 August 2008
Home < Slicer3:XNDContents
- 1 Example: Uploading data (non-dicom) to central.xnat.org using XNAT Desktop
- 1.1 Manage files to upload
- 1.2 Select tags for local data
- 1.3 Provide tag values for files you want to upload
- 1.4 Switch to tag view and check data description
- 1.5 Fixing misspecified tags
- 1.6 Create a project on the hosted repository
- 1.7 New project on hosted repository should correspond to local data description
- 1.8 Create a subject for each subject in the data to be uploaded
- 1.9 New subjects should correspond to local data description
- 1.10 Upload files to the hosted repository
- 1.11 Check progress in the XND console
- 1.12 Check hosted repository for upload results
- 1.13 Adding more data to the project on hosted repository
Example: Uploading data (non-dicom) to central.xnat.org using XNAT Desktop
Manage files to upload
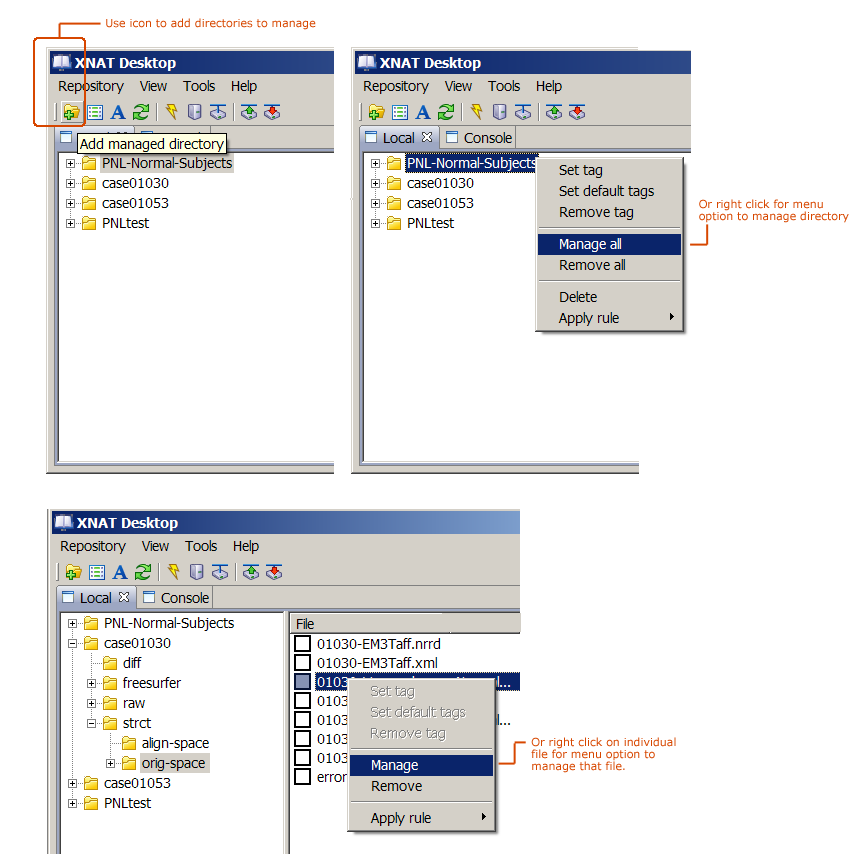
First, select local directories/folders or individual files to manage with XNAT Desktop.
Select the Add managed directory icon, choose Repository->Add dir, or right click on a directory/folder for a menu option to manage that folder with XNAT Desktop, as shown below. Or, right click on an individual file for a menu option to manage that file.
Select tags for local data
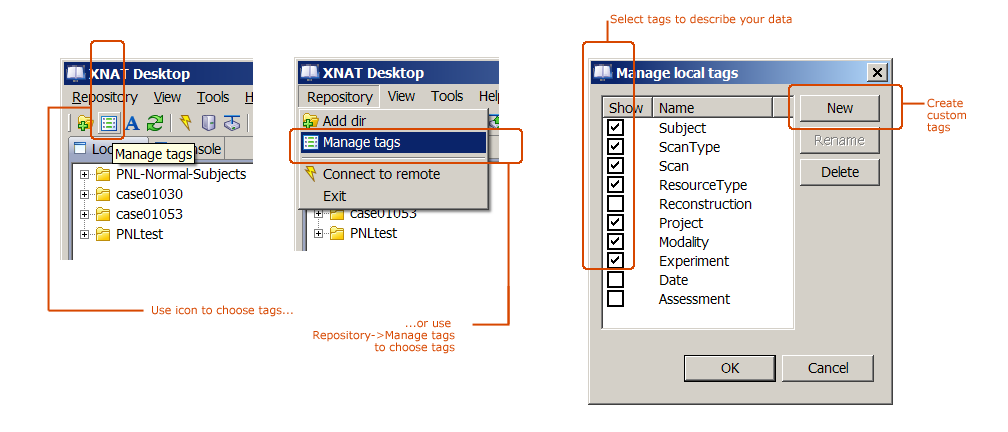
Next, choose tags for describing your data using the icon on the toolbar, or the Repository->Manage tags menu option. XNAT has a set of default tags that are important to use, and custom tags can be added using the "New" option on the pop-up, as shown below.
Provide tag values for files you want to upload
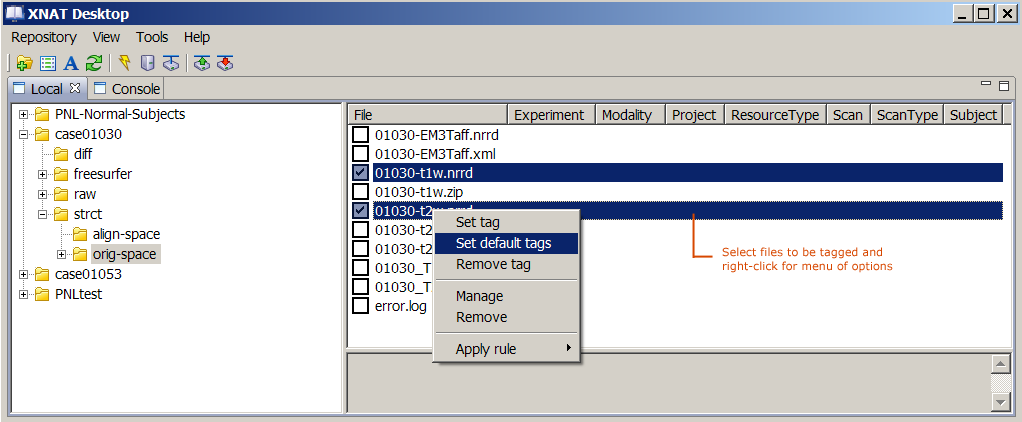
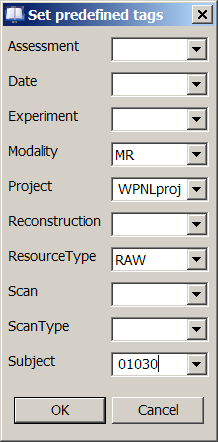
Using the "Set Default tags" option, select datasets to be described, and quickly add values for the tags you chose in the previous step. These values will apply to all selected datasets.
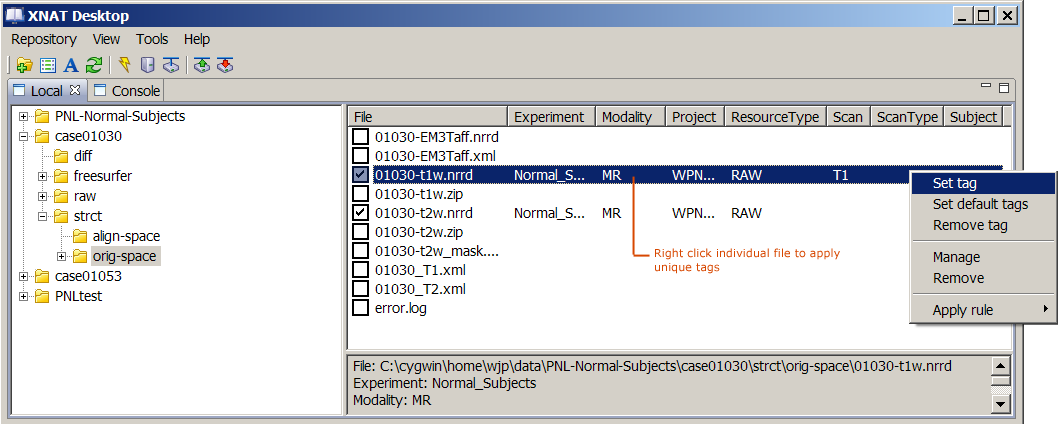
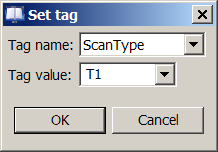
Or select individual datasets to be described, and add values for appropriate tags to each through the "Set tag" menu option. Note, in this example, the Experiment tag for each subject 01030 and 01053 are unique: Normal_Subjects_01030 and Normal_Subjects_01053, respectively.
Switch to tag view and check data description
Fixing misspecified tags
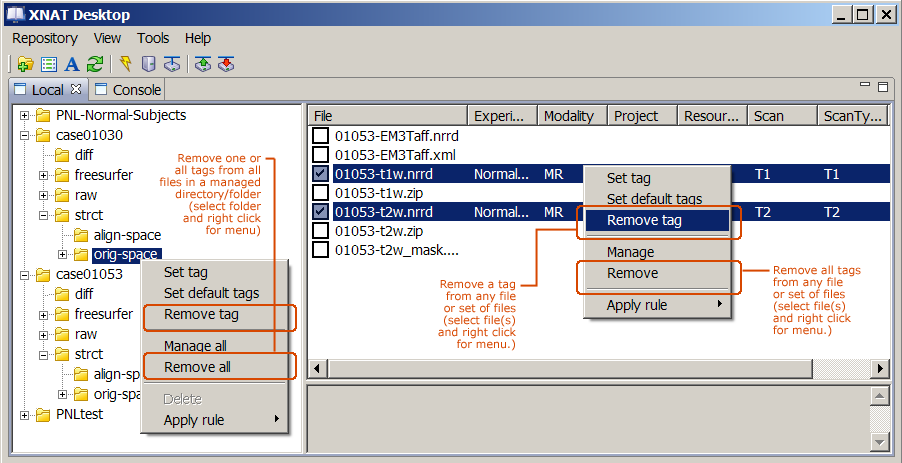
Any or all tags can be removed from managed files using the "Remove tag" or "Remove all" menu options as shown below (in "Folder view"). If you see any errors, remove a tag, and re-specify its value if appropriate.
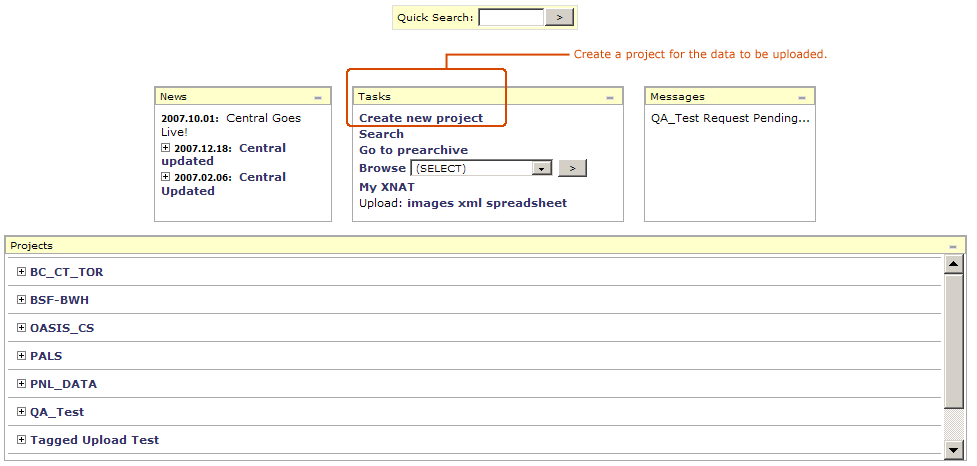
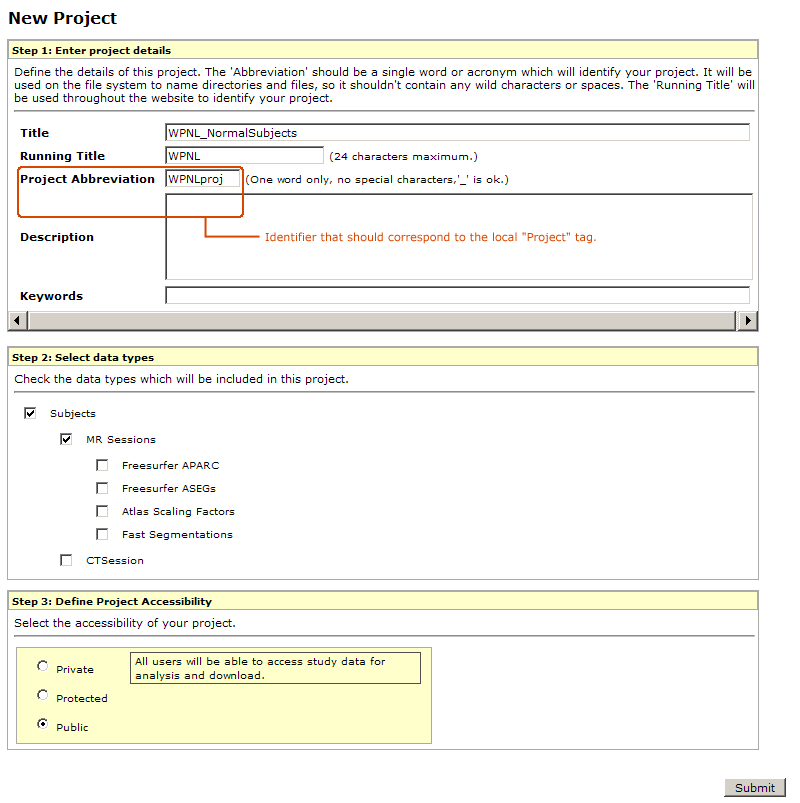
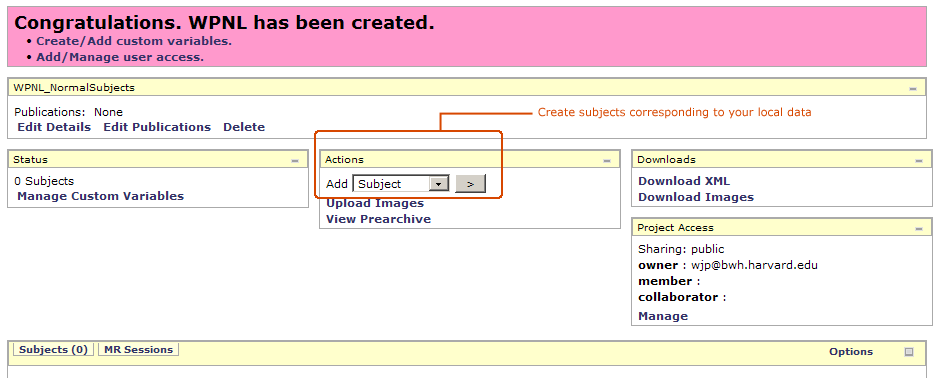
Create a project on the hosted repository
In this example, the hosted respository is http://central.xnat.org
New project on hosted repository should correspond to local data description
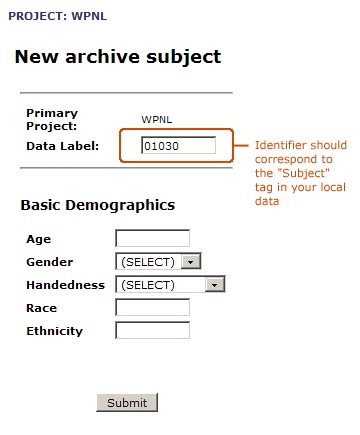
Create a subject for each subject in the data to be uploaded
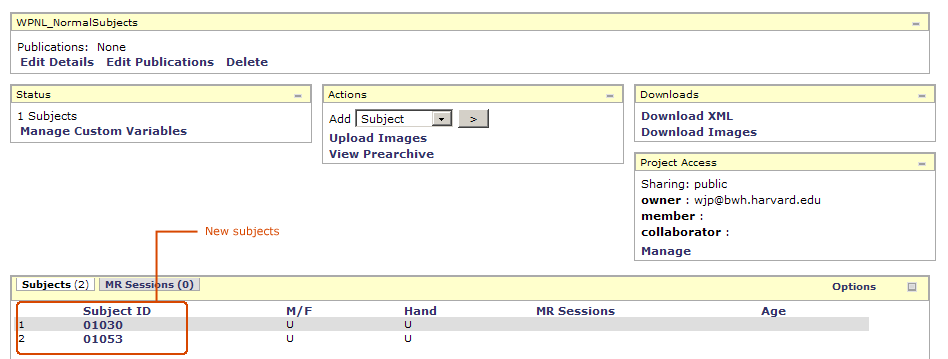
New subjects should correspond to local data description
Adding subject 01030.
Project display after adding two subjects.
Upload files to the hosted repository
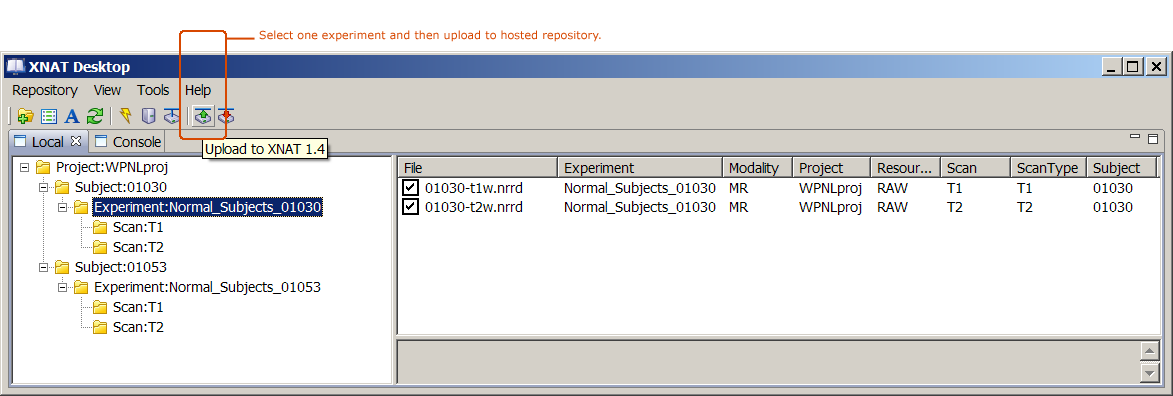
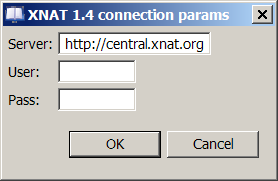
The current release version of XNAT Desktop actually can only upload one experiment at a time. Using this version, to upload each experiment, select it in the tag view hierarchy and use the upload tool as shown below.
A new version of XNAT Desktop to be released soon supports uploading multiple experiments, and has also a number of important upload bug fixes.
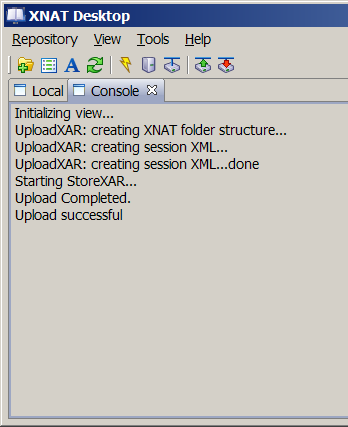
Check progress in the XND console
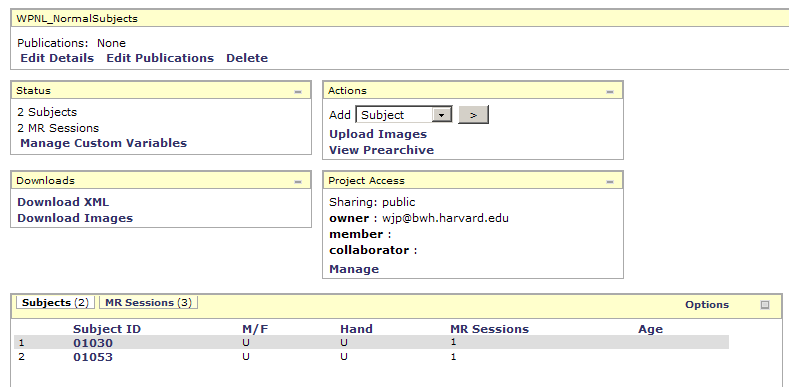
Check hosted repository for upload results
