Difference between revisions of "Modules:SpineSegmentation-Documentation-3.6"

From Slicer Wiki
Jump to: navigation, search
Line 51: Line 51:
 
  http://www.nitrc.org/plugins/scmsvn/viewcvs.php/Slicer3/Modules/SpineSegmentation/TestingData/?root=sylvainproject
 
  http://www.nitrc.org/plugins/scmsvn/viewcvs.php/Slicer3/Modules/SpineSegmentation/TestingData/?root=sylvainproject
  
===Tutorial and Usage===
+
===Quick Tour of Features and Use===
  
 
Below are the step-by-step instructions to load, process and save some sample data (see link above).
 
Below are the step-by-step instructions to load, process and save some sample data (see link above).

Revision as of 03:15, 14 May 2010

Home < Modules:SpineSegmentation-Documentation-3.6

Return to Slicer 3.6 Documentation

Gallery of New Features


Module Name

SpineSegmentation module for Slicer 3.6

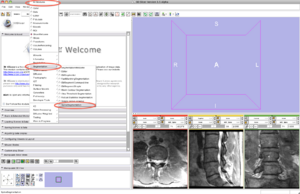
Load volume into Slicer3.6 and select the SpineSegmentation module
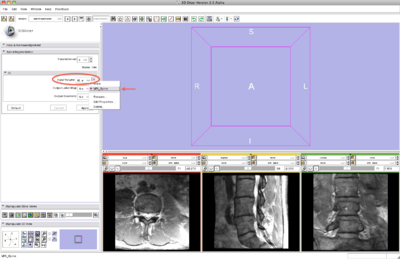
Select input and output nodes and click Apply
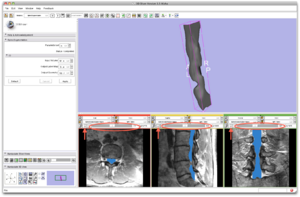
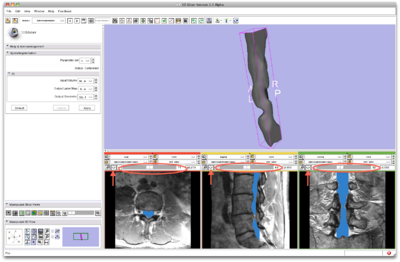
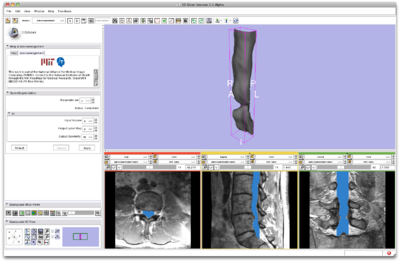
Processing takes approx. 3 minutes. The segmentation results are shown as a label map (blue) and a 3D model (3D view)

General Information

Module Type & Category

Type: Interactive or CLI

Category: Segmentation

Authors, Collaborators & Contact

  • Sylvain Jaume: MIT & logo, if desired
  • Contact: Sylvain Jaume, sylvain at csail.mit.edu

Module Description

Image segmentation of the spinal cord and the cerebro-spinal fluid in T2-weighted MRI images. The SpineSegmentation module implements a model-based pattern recognition algorithm for fully automated segmentation.

Usage

Use Cases, Examples

This module is especially appropriate for these use cases:

  • Use Case 1:
  • Use Case 2:

Examples of the module in use:

  • Example 1
  • Example 2

Tutorial

Links to sample data to use with the module tutorial:

  • Tutorial: see section below
    • Data Set

To download the sample data, you need to go to http://nitrc.org and create a username. The data are located at

http://www.nitrc.org/plugins/scmsvn/viewcvs.php/Slicer3/Modules/SpineSegmentation/TestingData/?root=sylvainproject

Quick Tour of Features and Use

Below are the step-by-step instructions to load, process and save some sample data (see link above).

Step 1. Load the sample data

  • Input panel:
    • Image input select the input image
    • Image output create Slicer node for output image
    • Model output create Slicer node for output model
  • Command panel:
    • Default reset input and output nodes to blank values
    • Cancel cancel the execution of the algorithm
    • Apply apply the segmentation algorithm (takes approx. 3 min)
1. load the sample data

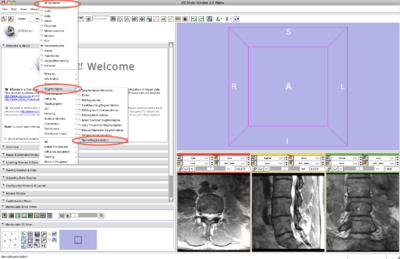
Step 2/9. Select the SpineSegmentation module

  • Input panel:
    • Image input select the input image
    • Image output create Slicer node for output image
    • Model output create Slicer node for output model
  • Command panel:
    • Default reset input and output nodes to blank values
    • Cancel cancel the execution of the algorithm
    • Apply apply the segmentation algorithm (takes approx. 3 min)
2. select SpineSegmentation module

Step 3/9. Select the input image

  • Input panel:
    • Image input select the input image
    • Image output create Slicer node for output image
    • Model output create Slicer node for output model
  • Command panel:
    • Default reset input and output nodes to blank values
    • Cancel cancel the execution of the algorithm
    • Apply apply the segmentation algorithm (takes approx. 3 min)
3. select input image

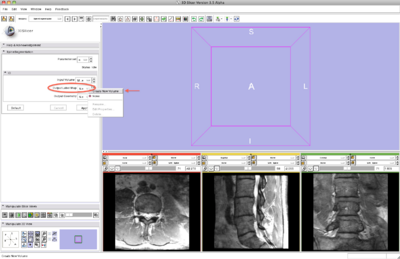
Step 4/9. Create a Slicer node for the output image

  • Input panel:
    • Image input select the input image
    • Image output create Slicer node for output image
    • Model output create Slicer node for output model
  • Command panel:
    • Default reset input and output nodes to blank values
    • Cancel cancel the execution of the algorithm
    • Apply apply the segmentation algorithm (takes approx. 3 min)
4. create image node

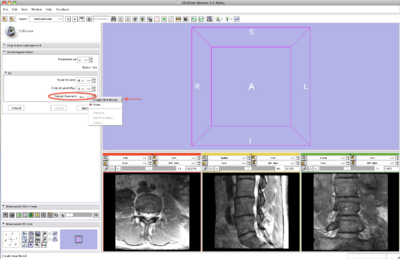
Step 5/9. Create a Slicer node for the output model

  • Input panel:
    • Image input select the input image
    • Image output create Slicer node for output image
    • Model output create Slicer node for output model
  • Command panel:
    • Default reset input and output nodes to blank values
    • Cancel cancel the execution of the algorithm
    • Apply apply the segmentation algorithm (takes approx. 3 min)
5. create model node

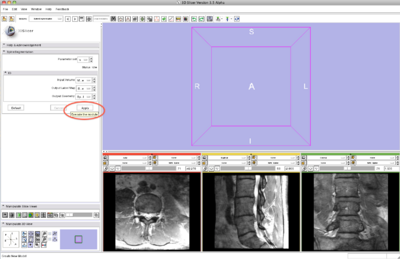
Step 6/9. Apply the segmentation algorithm

  • Input panel:
    • Image input select the input image
    • Image output create Slicer node for output image
    • Model output create Slicer node for output model
  • Command panel:
    • Default reset input and output nodes to blank values
    • Cancel cancel the execution of the algorithm
    • Apply apply the segmentation algorithm (takes approx. 3 min)
6. apply algorithm

Step 7/9. Review segmentation result

  • Input panel:
    • Image input select the input image
    • Image output create Slicer node for output image
    • Model output create Slicer node for output model
  • Command panel:
    • Default reset input and output nodes to blank values
    • Cancel cancel the execution of the algorithm
    • Apply apply the segmentation algorithm (takes approx. 3 min)
7. review result

Step 8/9. Save result image and model

  • Input panel:
    • Image input select the input image
    • Image output create Slicer node for output image
    • Model output create Slicer node for output model
  • Command panel:
    • Default reset input and output nodes to blank values
    • Cancel cancel the execution of the algorithm
    • Apply apply the segmentation algorithm (takes approx. 3 min)
8. save results

Step 9/9. Find contact information for help and paper reference

  • Input panel:
    • Image input select the input image
    • Image output create Slicer node for output image
    • Model output create Slicer node for output model
  • Command panel:
    • Default reset input and output nodes to blank values
    • Cancel cancel the execution of the algorithm
    • Apply apply the segmentation algorithm (takes approx. 3 min)
9. help information

Development

Notes from the Developer(s)

Algorithms used, library classes depended upon, use cases, etc.

Dependencies

Other modules or packages that are required for this module's use.

Tests

On the Dashboard, these tests verify that the module is working on various platforms:

Known bugs

Links to known bugs in the Slicer3 bug tracker


Usability issues

Follow this link to the Slicer3 bug tracker. Please select the usability issue category when browsing or contributing.

Source code & documentation

Links to the module's source code:

Source code:

Doxygen documentation:

More Information

Acknowledgment

Include funding and other support here.

References

Publications related to this module go here. Links to pdfs would be useful.