Difference between revisions of "Modules:AtlasCreator"
| Line 28: | Line 28: | ||
This module supports different usage types: | This module supports different usage types: | ||
| − | # Simple Atlas Creation | + | # [[Modules:AtlasCreator#HowTo:_Simple_Atlas_Creation|Simple Atlas Creation]] |
# The advanced graphical user interface | # The advanced graphical user interface | ||
# The command line interface | # The command line interface | ||
Revision as of 20:00, 14 April 2011
Home < Modules:AtlasCreatorReturn to Slicer 3.6 Documentation
AtlasCreator
General Information
Module Type & Category
Type: Built-in Loadable Module
Category: Registration
Authors, Collaborators & Contact
- Daniel Haehn, University of Pennsylvania
- Kilian Pohl, University of Pennsylvania
- Contact: Daniel Haehn (haehn@bwh.harvard.edu)
Module Description
The Atlas Creator module aligns images paired with segmentations to generate statistical atlases for several segmented structures.
Usage
This module supports different usage types:
- Simple Atlas Creation
- The advanced graphical user interface
- The command line interface
- External invocation using the Atlas Creator MRML Node
Use Cases, Examples
Input Data Requirements
The Atlas Creator expects input data to be structured the following way:
- In general each original image is accompanied by a manual segmentation.
- The images and the segmentations have to be in two different folders but have matching filenames.
- All images and segmentations have to be in Slicer-readable format.
- For Example:
- ./originals/case1.nrrd
- ./originals/case2.nrrd
- ./originals/case3.nrrd
- ./segmentations/case1.nrrd
- ./segmentations/case2.nrrd
- ./segmentations/case3.nrrd
HowTo: Simple Atlas Creation
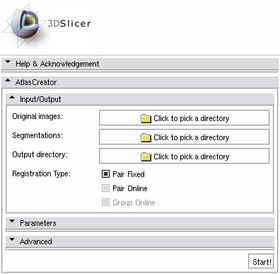
The following steps perform a Pair Fixed Registration against an automatic chosen template for automatically detected structures.
1. Select the directories containing the Original Images and the Segmentations in the Input/Output panel.
2. Select an Output Directory in the Input/Output panel. It makes sense to create a new directory to use for the Output.
3. Hit 'Start!'
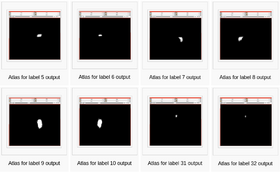
4. After some wait (minutes or hours!, depending on the number of input cases), the generated atlases and the used template will be loaded into 3D Slicer.
Tutorials
Links to tutorials explaining how to use this module:
- Tutorial 1
- Data Set 1
Quick Tour of Features and Use
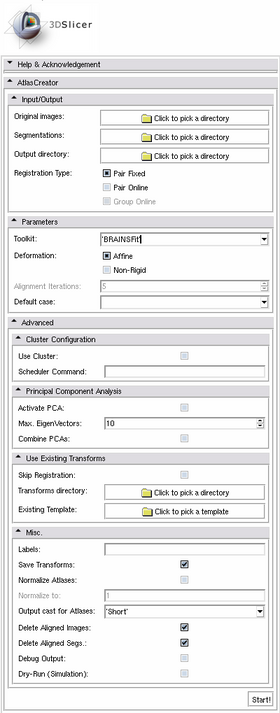
A list panels in the interface, their features, what they mean, and how to use them. For instance:
|
Development
Notes from the Developer(s)
Dependencies
Tests
On the Dashboard, these tests verify that the module is working on various platforms:
- MyModuleTest1 MyModuleTest1.cxx
- MyModuleTest2 MyModuleTest2.cxx
Known bugs
Usability issues
Source code & documentation
Links to the module's source code:
Source code:
Doxygen documentation:


